Instagram Live is the most underrated feature of this platform. It opens new doors for Instagram creators like you — you can interact with your followers in real-time, stay on top of their minds, and, in the process, attract more.
With just a few clicks, you can virtually knock at your followers’ doors at any moment and have a personal moment with them.
Through Instagram Live, you can casually chat with your followers, answer their questions face-to-face, and even promote business offerings.
The opportunities are endless!
So, let’s learn about how to go live on Instagram on Android and iOS devices, computer/PC, and all other relevant questions!
How to Go Live on Instagram on Android & iOS?📱
Going live on Instagram on your mobile devices is as straightforward as ABC. You need to follow the same steps for both Android and iOS smartphones.
Step #1: Open the Instagram app and log in to your account.
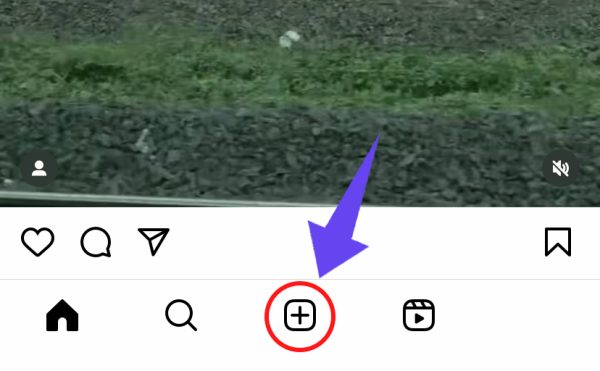
Step #2: Right-swipe on the home screen or tap on the Add icon (“plus-in-the-square” icon) at the bottom-center of your screen.

Step #3: Scroll left until you reach “LIVE.”

Step #4: On the left, tap on the “Add a Title” icon (similar to the Align Text Left icon) – it’s the topmost of the three clustered icons. Type a title. Remember, all followers and live viewers can see it.

Step #5: On the same line, tap on the “Broadcast Audience” icon.

Step #6: Keep it “Public” – the default setting – if you’re ready to go live right away. The setting notifies all followers and anyone can watch the live.

Note: If you want to have a trial, set it to “Practice.” This will not notify anyone else, so you can comfortably practice alone or with a few others by inviting them manually.
You can also schedule a live at a later date and time using the “Calendar” icon below that. A select few also have a fundraising tool available for live.
Step #7: Once you’re ready, tap the LIVE button in the bottom center.

While you’re at it, you can check the number of viewers on the top and the comments on the bottom.
You can interact verbally with your viewers. Or add a comment by tapping on the Comment icon at the screen bottom.
You can also tap on your own or others’ comments and tap “Pin comment” to highlight comments. Use this to say something important to all viewers without repeating yourself or highlight someone else’s comment.
Step #8: When you’re finished with the live video, tap the cross icon at the top right. It prompts, “Are you sure you want to end your live video?”
![]()
Step #9: offers two options: “End video” for Android, “End now” for iOS, and “Cancel.”
Tap on “End video”/“End now.”

Step #10: Tap on “Share” to share the live on your profile.

Some other controls to manage your life from the phone are:
Tap on the horizontal triple button on the bottom, and you’ll find a range of live management options:
- Add a Moderator: It lets you appoint someone as a moderator during the live. They can report offensive comments, remove viewers from the live, and turn off comments.
- Turn off Comments: It restricts viewers from commenting. If your profile has keyword filters turned on, that will also apply on the live.
- Turn off Requests to Go Live: It restricts viewers from sending requests to go live with you.
- Turn off Questions: It prevents viewers from sending questions.
How to Go Live on Instagram with Close Friends?👬
Currently (as of March 2024), Instagram doesn’t have a separate option to go live on Close Friends. You can instead do this:
Step #1: Launch the Instagram app>Right swipe>Swipe until you reach “LIVE.”

Step #2: Tap on the “Broadcast Audience” icon and choose “Practice”>“Set audience.”

Step #3: On the bottom line, click on the “Invite to join.”

Step #4: Manually type in the Instagram handles or account names of people in your “Close Friends” list.

Step #5: Click on “Invite” for each. If you mistakenly invite anyone, you can also tap on “Cancel” to undo the invite.

How to Go Live on Instagram on a Computer/PC? 🖥️
Instagram is yet to create an official option to go live from the browser of your computer/pc. However, Instagram Live Producer has turned this into a reality.
It helps you go live from any system other than your mobile with the help of streaming software (such as Streamlabs, OBS, etc.) via a stream key.
To make this happen, here’s what you need to do.
A. Follow these Suggestions for Tech Requirements
📹 Video Formats
1. 9×16 Aspect Ratio (suggested, not mandatory)
2. 720p @ 30 fps (suggested, not mandatory)
- Resolution: 720×1280
- Video Bitrate Range: 2250-6000 Kbps
- Also supports: 480p @30 fps, 360p
🔊 Audio Formats
- Sample rate: 44.1 KHz
- Channel layout: Stereo
- Bit rate: Till 256 Kbps
B. Create the Right Setup
Step #1: Choose a trustworthy streaming software, such as OBS, Streamlabs, Streamyard, etc.
Step #2: Open the streaming software interface and identify where you must input the URL and stream key. URL and stream key let you broadcast the streaming software setup to go Live directly.
Step #3: Log in to your account on instagram.com. Go to the plus/Create button on the left and select “Live” from the menu.
Step #4: You’ll be taken to the “Go Live” screen. Add a title for the live and select broadcast audience. Click on “Practice” to avoid notifying others or being visible to them. Opt for “Public” to inform and be visible to others.
Step #5: The next screen shows your unique URL and stream key and instructions on using them. You can copy the stream key or generate a new one if necessary.
However, the stream key doesn’t stay constant and gets refreshed every time you use Live Producer.
C. Stream to Instagram Live
Step #1: In the streaming software, input the URL and stream key. This adds Instagram Live as your streaming endpoint.
Step #2: When you’ve set up everything, start the stream on the streaming software. In the Instagram Live Producer viewer on instagram.com, you’ll get a preview of how your stream will look on Instagram Live. It may take some seconds to display the preview screen.
Step #3: When you’re satisfied with the preview and confirm it, click on “Go Live” in the Live Producer. This starts the live stream.
Step #4: During the live, the “Comments” tab lets you read and engage with viewers’ comments. To manage comments, click on any comment. You’ll get two options:
- Report: It’s used to flag inappropriate comments.
- Pin Comment: It’s used to highlight a comment. You can also unpin a comment by clicking on the “X” on its right.
Step #5: When you’re done, end the live by clicking “End live video.”
Important: Don’t end the stream on the streaming software before the one on the Live Producer broadcast. Otherwise, the video continues with the last frame of your stream. So, end the broadcast on the Live Producer first for a seamless end.
Can I Save My Live after Ending It?
Yes. But that’s possible only if you have Live Archive enabled. To do that, follow these steps:
- Go to your profile. Tap on the three-horizontal-line/hamburger icon.
- Scroll down until you find “Archiving and downloading” under “Your app and media.”
- Switch on the toggle beside “Save live to archive.”
After this, the live gets saved in Live Archive. You can watch, share, and even download it. You can access it with these steps:
- Tap on the three-horizontal-line/hamburger icon on the top right of your profile.
- Go to “Archive.” If it shows “Stories Archive,” tap on it and switch to “Live Archive” from the dropdown. You’ll find all lives from the last 30 days.
How to Get an Instagram Live Producer?
You need a Professional Instagram account to access Instagram Live Producer. Here’s how you can do it:
- On your phone, tap on the three-horizontal-line/hamburger icon on the top right of your profile. Or, on the browser, tap on the three-horizontal-line/hamburger icon on the bottom left>“Settings”
- Scroll down to find “Account type and tools” under “For professionals.”
- Click on “Switch to professional account.”
- Pick the “Category” that describes your profession the best and click on “Done.”
- If your profile is private, this will give a prompt about making your profile public. Click on “OK.”
- Select “Creator/Business”>“Next”>“Next.”
- Type in contact details and tap on “Next”. Or skip by tapping on “Don’t use my contact info.”
- You can “Log in to Facebook” or tap on “Skip.”
- You may set up the professional account and complete a few more optional steps. Or tap on “X” to skip and return to the profile.
I Can’t Go Live on Instagram. Why?
This might be for several reasons: poor internet service or app bugs. A few things to try to fix it are:
- Ensure your internet service is strong.
- Ensure the app is updated.
- Close and restart the app.
- Restart your phone.
Frequently Asked Questions
How Many Followers are Needed to Go Live on Instagram?
None. There’s no restriction with respect to follower count when it comes to Instagram Live. You can broadcast it with any kind of Instagram account with any amount of followers.
When Using Live Producer, Will Viewers be able to Interact as Usual?
Yes. But you can only interact with them through the Live Producer Interface. Moreover, Live Producer still doesn’t support lots of features, including Live Rooms, Fundraisers, Q&A, and Shopping.
Can I Stream Both on Facebook and Instagram Simultaneously?
No. This is not possible yet. However, you may use streaming software that simultaneously broadcasts (simulcast) and add Instagram Live as a custom RTMP endpoint.
Does Live Producer Let Me Stream Horizontally?
Yes. For this, choose a vertical 9:16 aspect ratio. If you don’t opt for this, the video will automatically be cropped to fit the 9:16 ratio.
The 9:16 ratio is also recommended to allow you the necessary screen space above and below the horizontal video for graphics, PIP, etc.
Does the Live Producer allow Live Moderation?
This feature is not compatible yet.
Can I Add a Guest/Co-Host Using Live Producer?
This feature isn’t supported yet.
Does Instagram Plan to Support a True API Soon?
Till now, there has been no such news.
How to Monetize Instagram Live Streams?
Go live on Instagram with badges that viewers can buy and show support. While you earn, they gain recognition during the stream.
However, to enable badges, you must be located in the US, be 18 years old or above, and have 10,000 followers at least.
How to Accept a Friend/Fan’s Request to Go Live with You?
During your live video, people may send you a request to join your live. Here’s how you can find and treat them:
- Check the comment section, and you’ll find the notification for all requests to go live with you.
- Tap “View.”
- Tap “Go Live with <Instagram_handle>” if you want to accept their request. Or click on “Cancel” to refuse.
A Word from Viralyft!
Remember, Instagram Live not only connects you with your audience but also makes you more approachable.
You get the opportunity to be more than just another account on their following list. So, make the best out of it!
However, remember that miracles and big empires need hard work. You can’t build a community and make the algorithm work in your favor with live streaming alone.
So, prepare well – whether it’s a script outline, your clothes, makeup, or basic grooming. Other than that, be you and try to make the live interactive so you’re not the only one speaking.

